
Managing employee leave is one of the most important responsibilities for HR teams and managers. Leave requests need to be reviewed and acted on promptly, whether the decision is to approve or reject them. At the same time, teams need visibility into who is away and when to ensure work continues smoothly.
For many organizations, managing leave through spreadsheets and manual processes is no longer practical. It becomes difficult to track balances, follow approval processes, and keep records up to date.
That's why we built leave management in SteadyPoint HRIS to be straightforward and easy to manage.
With SteadyPoint HRIS:
HR can:
- Define leave types and the number of days available for each employee
- Set up leave balance overrides when employees are entitled to different leave allowances
Employees can:
- Submit leave requests by selecting the leave type and dates
- Add reasons and supporting documents when needed
Approvers can:
- Review leave requests directly from their accounts
- Approve or reject requests in just a few clicks
In this blog, we'll walk through how to configure leave types and balances, submit leave requests, and manage the approval process in SteadyPoint HRIS.
Ready to try it yourself? Start your free trial of SteadyPoint HR. For more guides, visit the HR App blog.
1. Configure leave types and templates
SteadyPoint HRIS comes with predefined leave types. You can find them under:
Settings > Leave Types & Templates
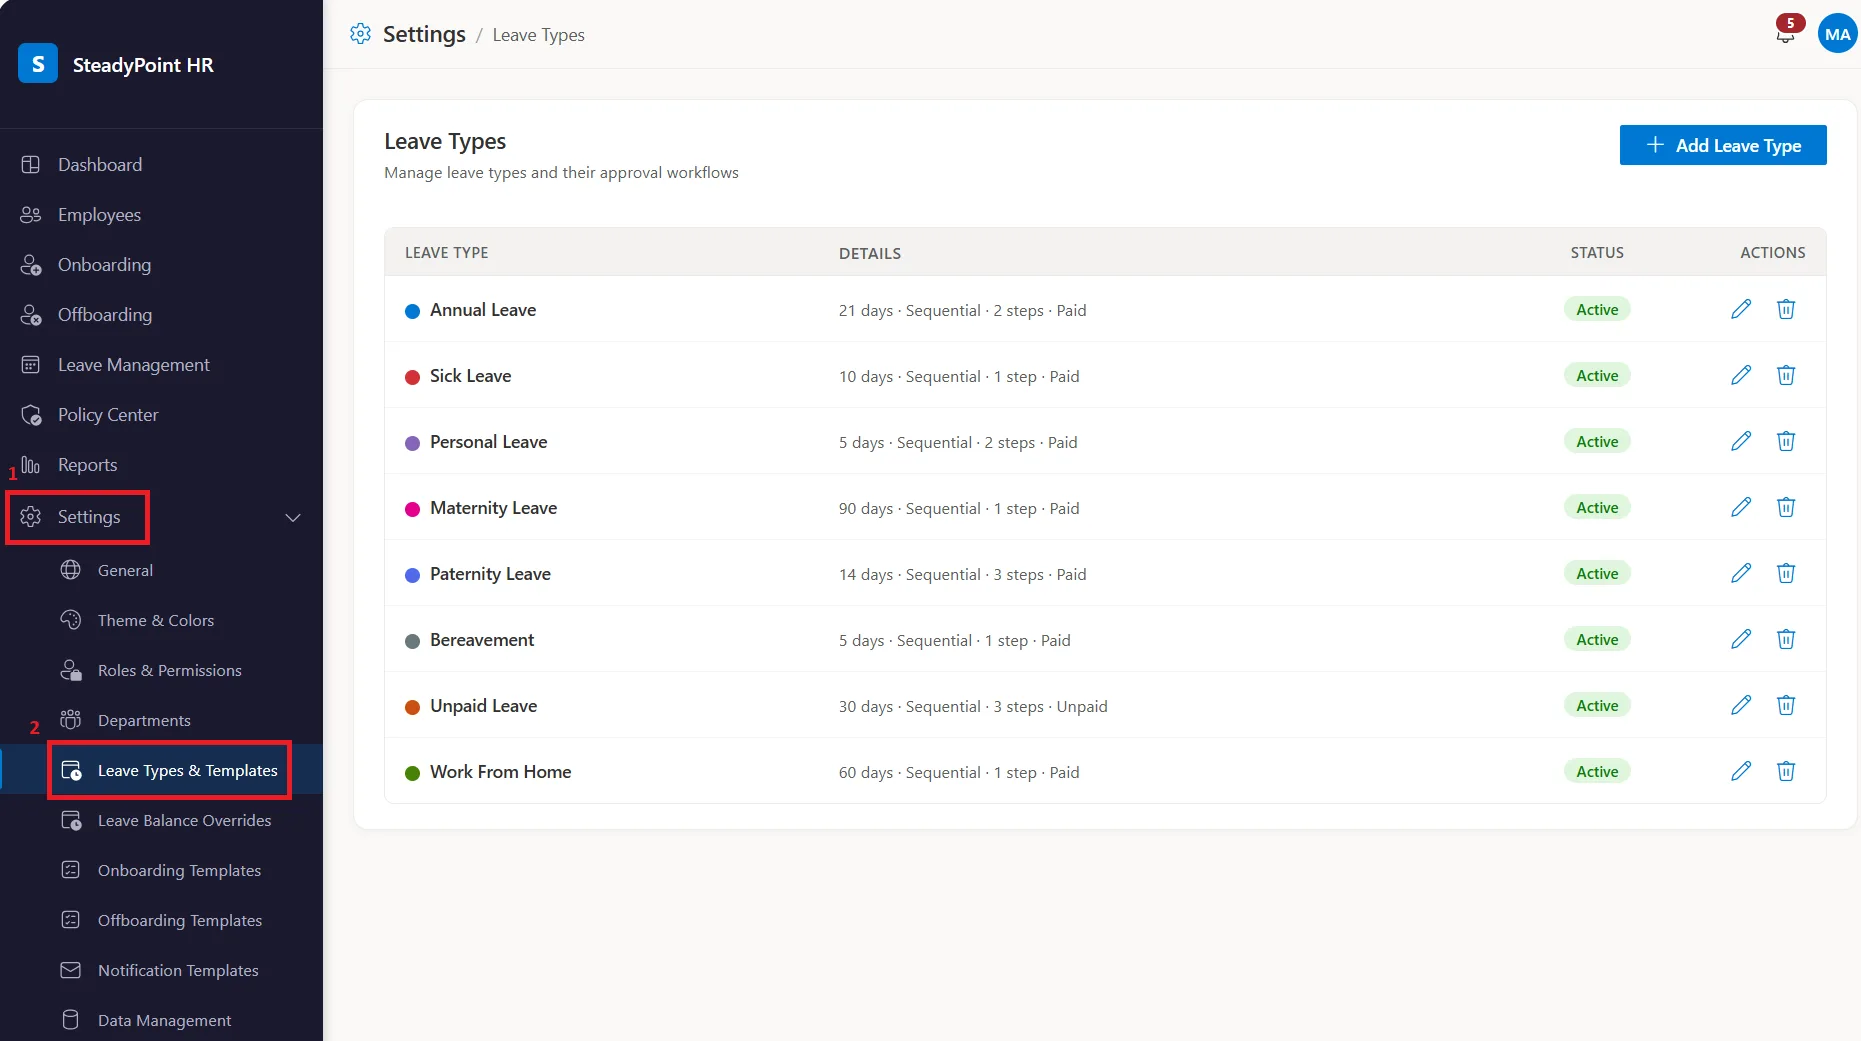
From here, HR admins can:
- Edit existing leave types
- Delete leave types that are no longer needed
- Add new leave types
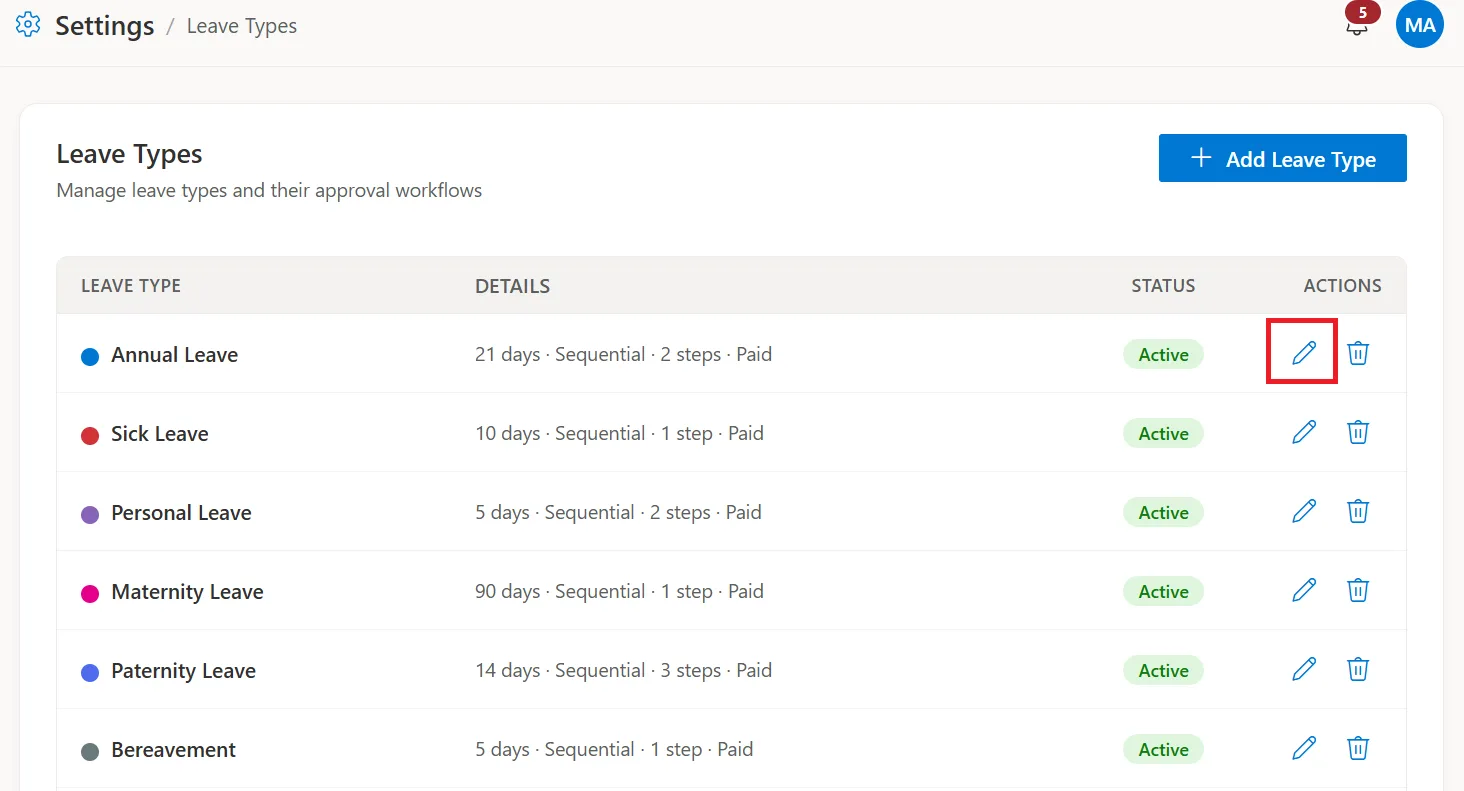
A. Edit existing leave types
Every company has its own leave policies. If the predefined leave types or the number of allocated days don't match your requirements, you can easily update them.
Simply click the Edit icon next to the leave type you want to modify.
You can:
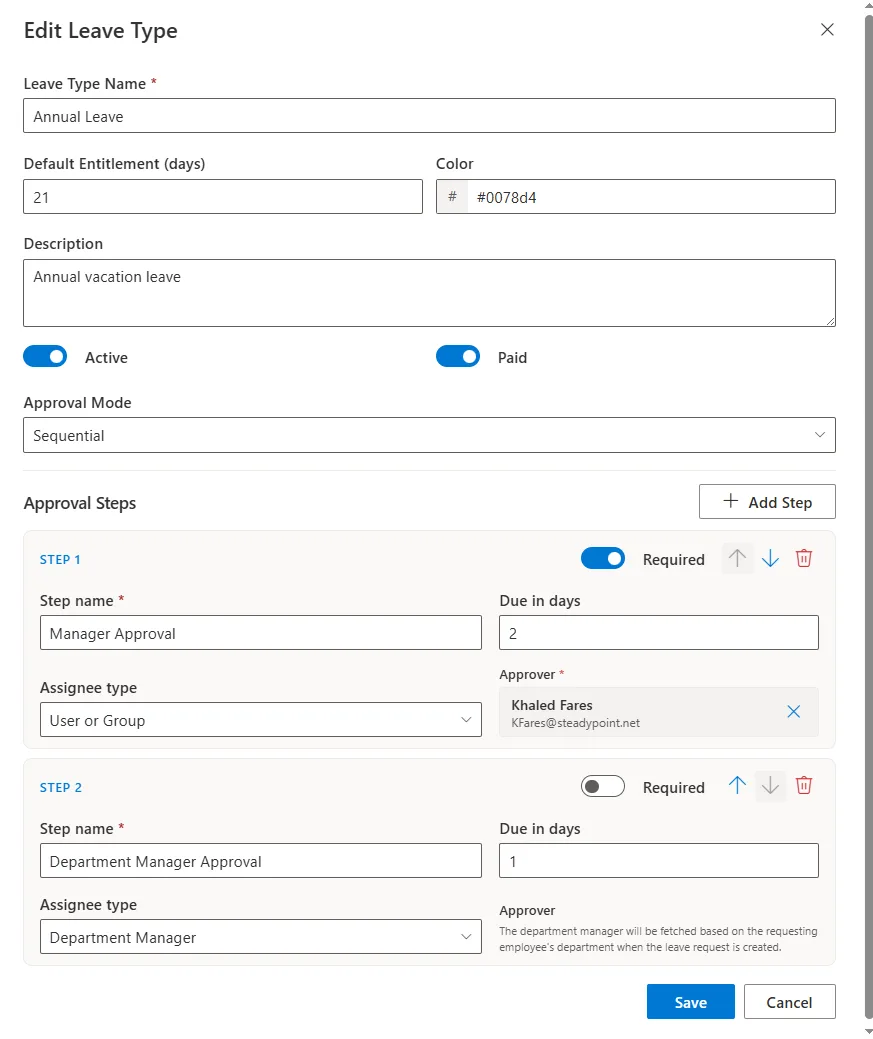
- Change the leave type name
- Update the default number of leave days
- Mark the leave type as active or inactive
- Set it as paid or unpaid leave
- Change the approval mode to sequential or parallel
- Add or remove approval steps
This allows you to tailor leave policies to fit the way your organization operates.
B. Add new leave types
If you need additional leave categories, simply click + Add Leave Type.
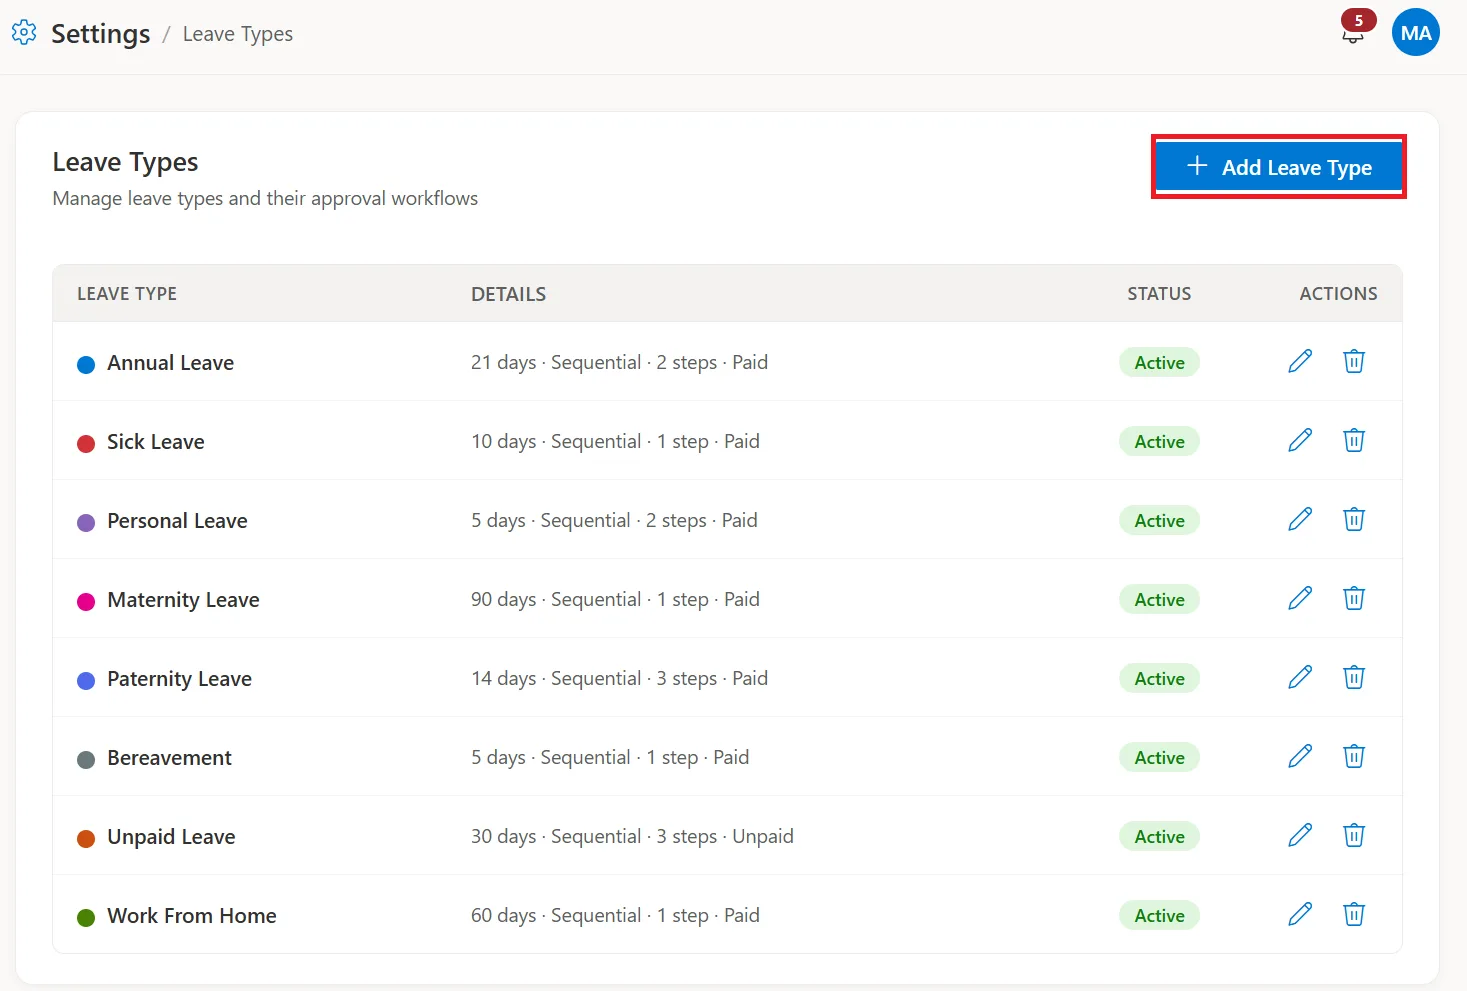
This opens a new screen where you can create your own leave types and configure their settings.
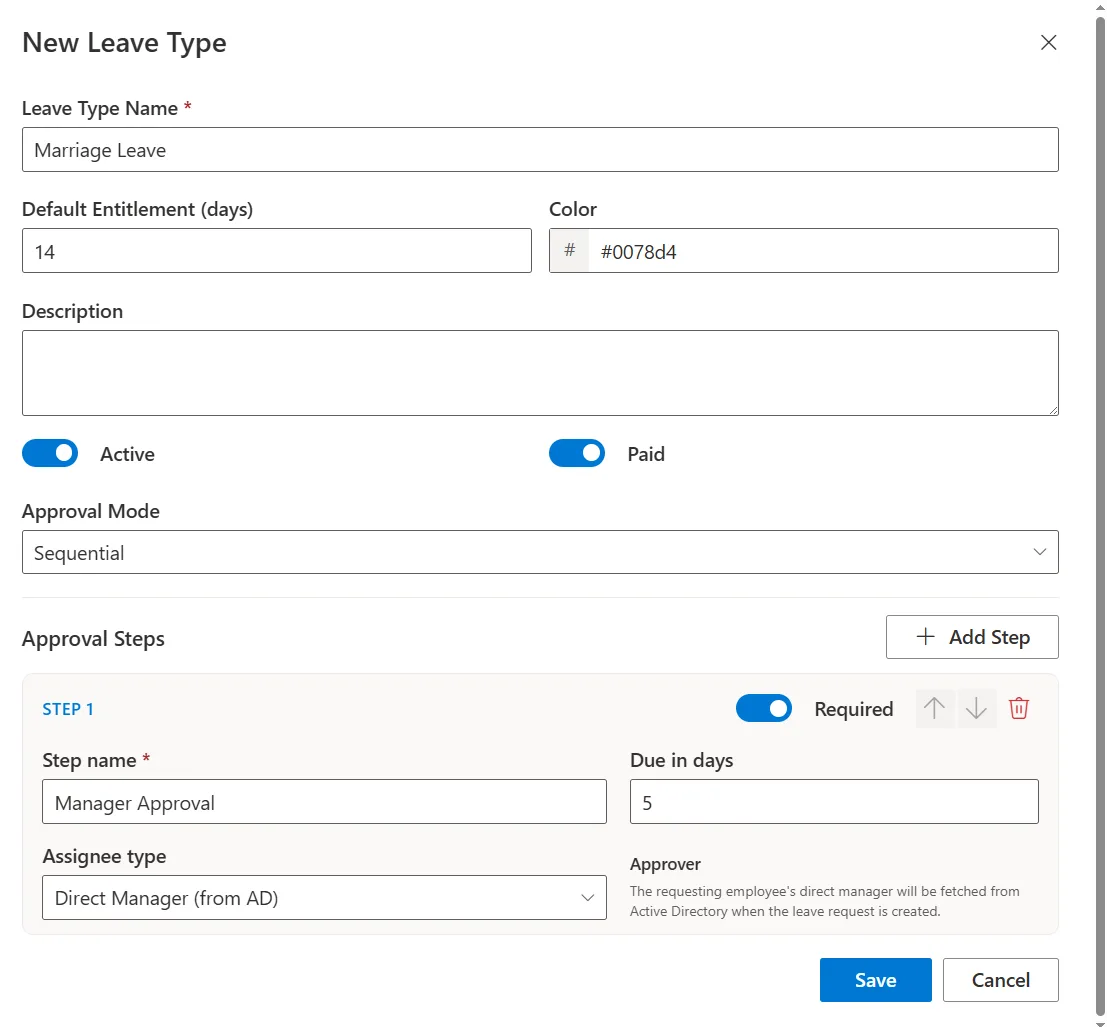
For example, you may want to add:
- Marriage Leave
- Study Leave
You can create as many leave types as needed and configure each one independently.
2. Configure leave balance overrides
There are times when employees are entitled to a different number of leave days than the standard company policy.
To set up an override:
- Go to Settings > Leave Balance Overrides
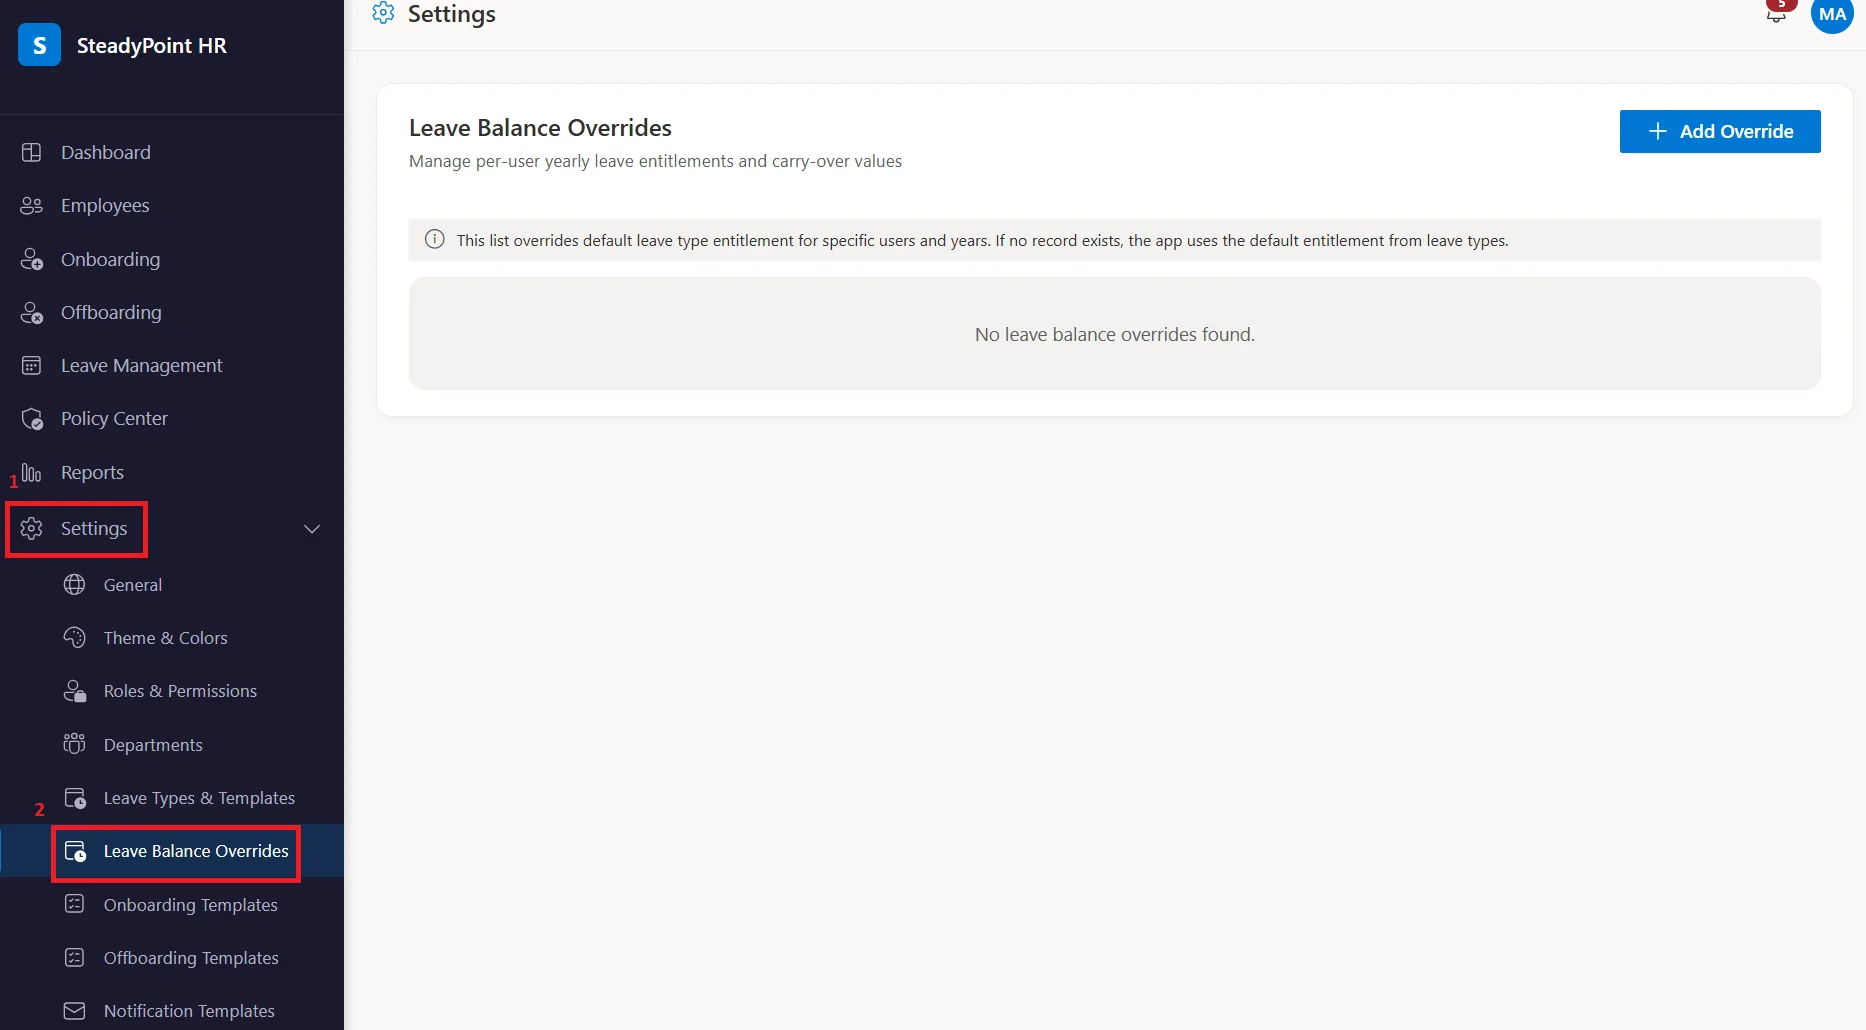
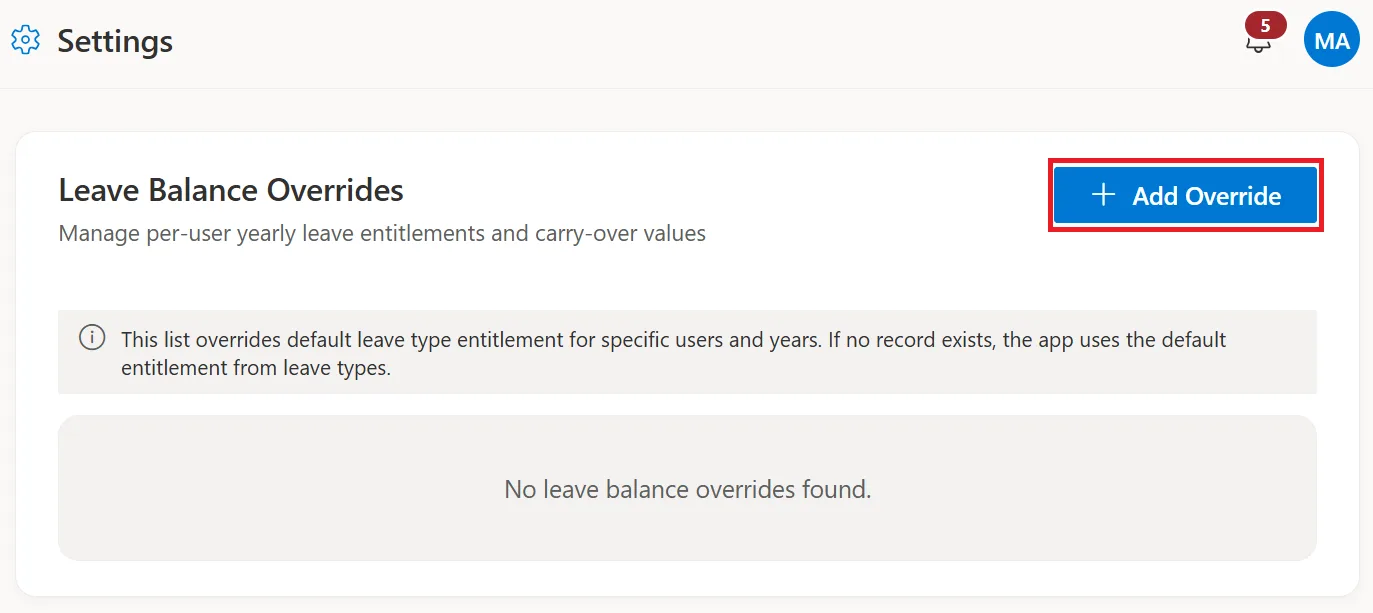
- Click Add Override
- Select the employee
- Enter the year, leave type, entitled days, and carried-over balance if applicable
- Save the changes
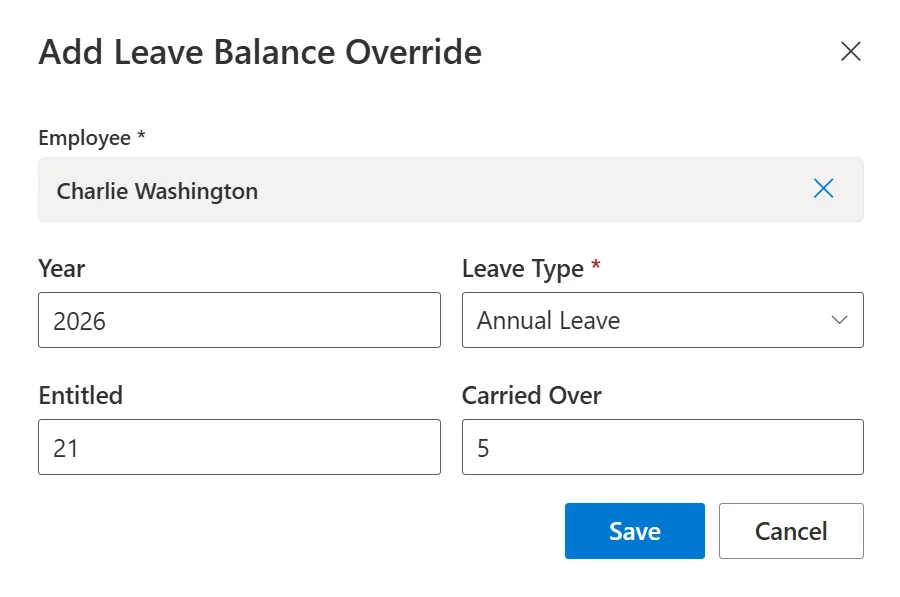
This makes it easy to manage exceptions without affecting leave entitlements for other employees.
3. Submit a new leave request
To create a leave request, employees should:
- Navigate to Leave Management > New Request
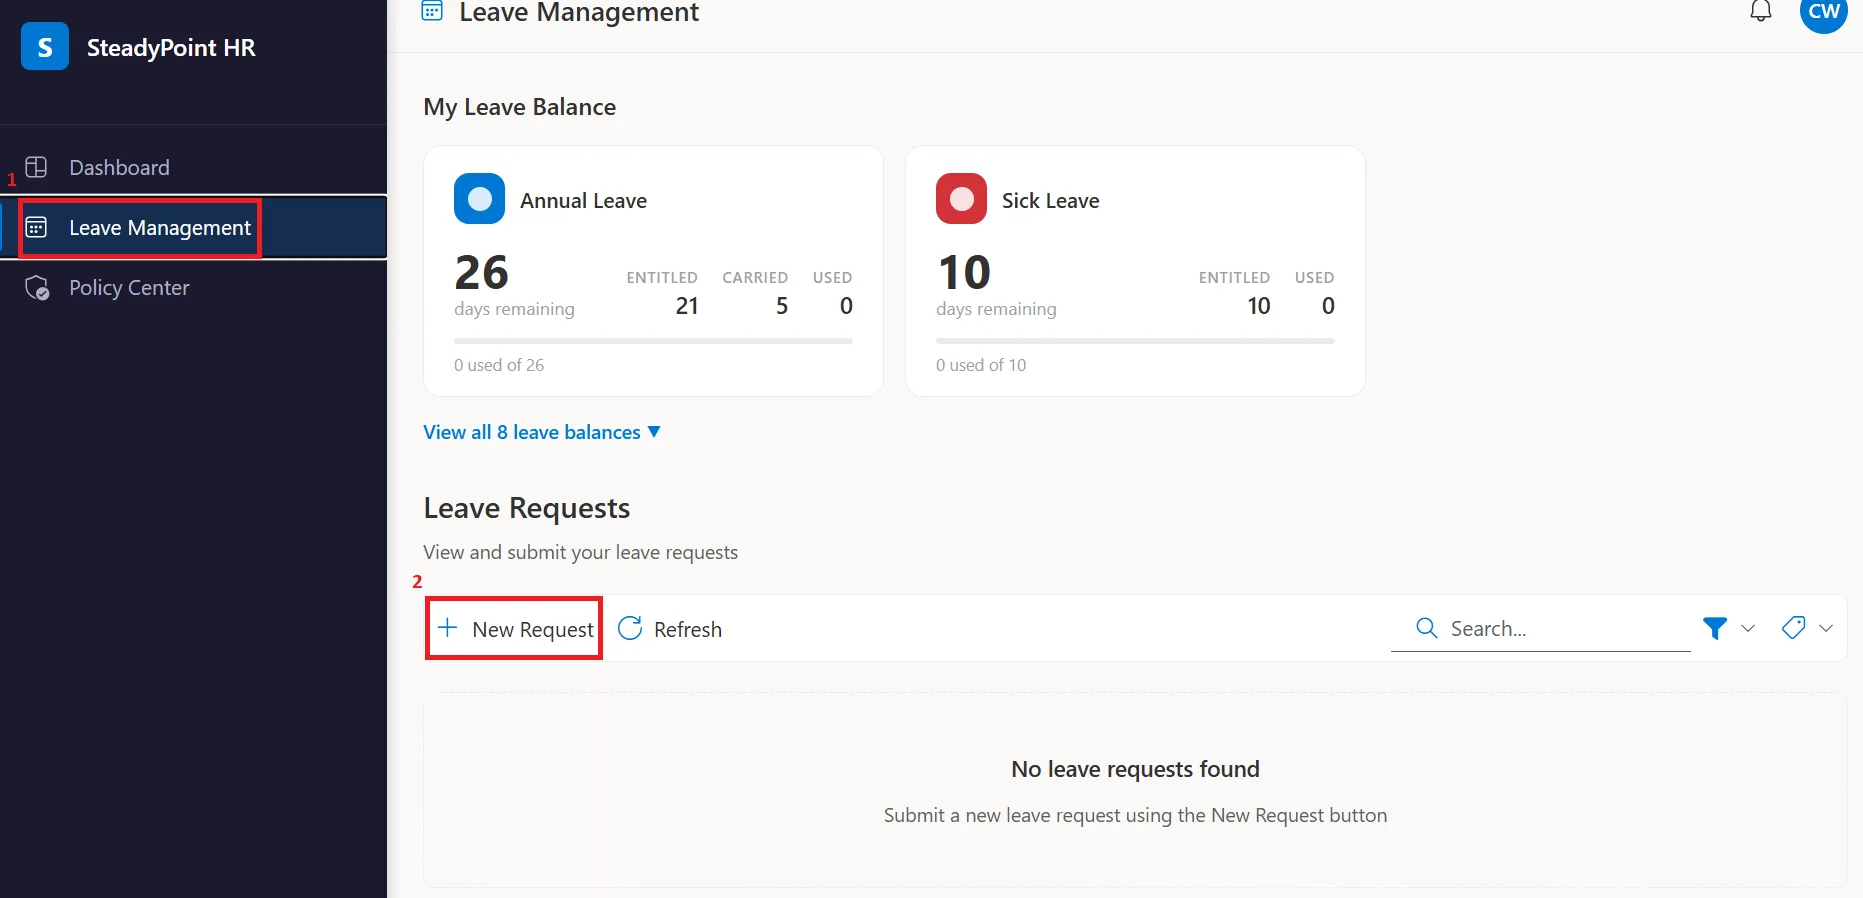
- Select the leave type
- Enter the start and end dates
- Specify the duration
- Add the reason for the leave
- Attach any supporting documents if required
- Click Submit Request

The request is then automatically sent to the assigned approvers.
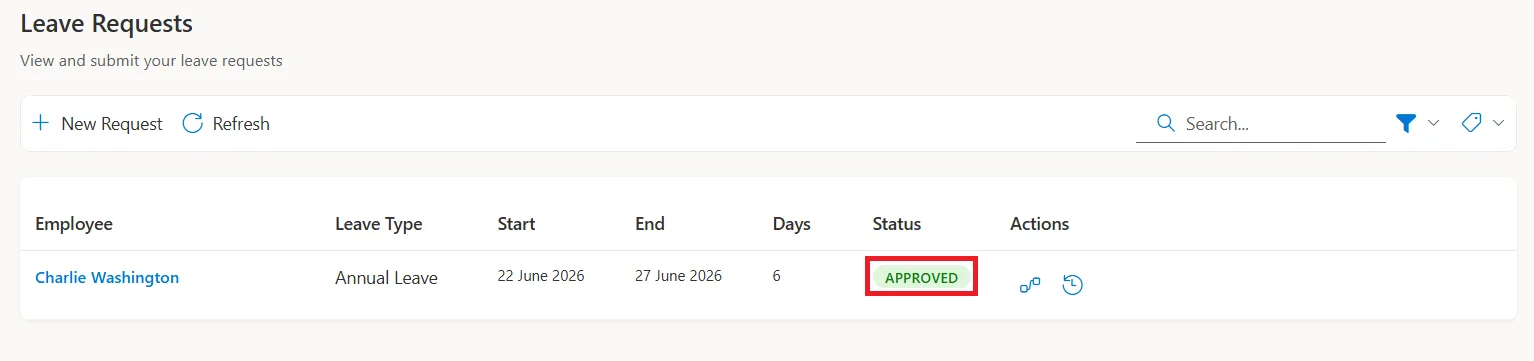
4. Review and approve leave requests
Once a request is submitted, the approver receives an email notification asking for action.
The approver can review the request details and either approve or reject it. If multiple approval steps are configured, the system automatically follows the selected workflow until all required decisions are completed.
Final note
SteadyPoint HRIS takes the hassle out of leave management by bringing leave policies, balances, requests, and approvals together in one place. Instead of relying on spreadsheets and manual follow-ups, HR teams and managers can manage the entire process through a simple, structured workflow that saves time and keeps everyone on the same page.