Ticket filter customization in SteadyPoint Helpdesk allows system admins to create personal, public, and custom filters, while other members can create personal filters.
You can use filters to focus on the tickets that matter most. Create personal filters (visible only to you), public filters (visible to everyone), or custom filters (visible to selected users), depending on your permission level.
Discover how custom filters help teams prioritize better and respond faster. 👉 Schedule a quick demo tailored to your use case.
How to create a ticket filter
Step 1: Open filters
Click the Filter icon, then select the + sign to create a new filter.
Step 2: Configure basic filter settings
You will see all attributes available for customizing the filter.
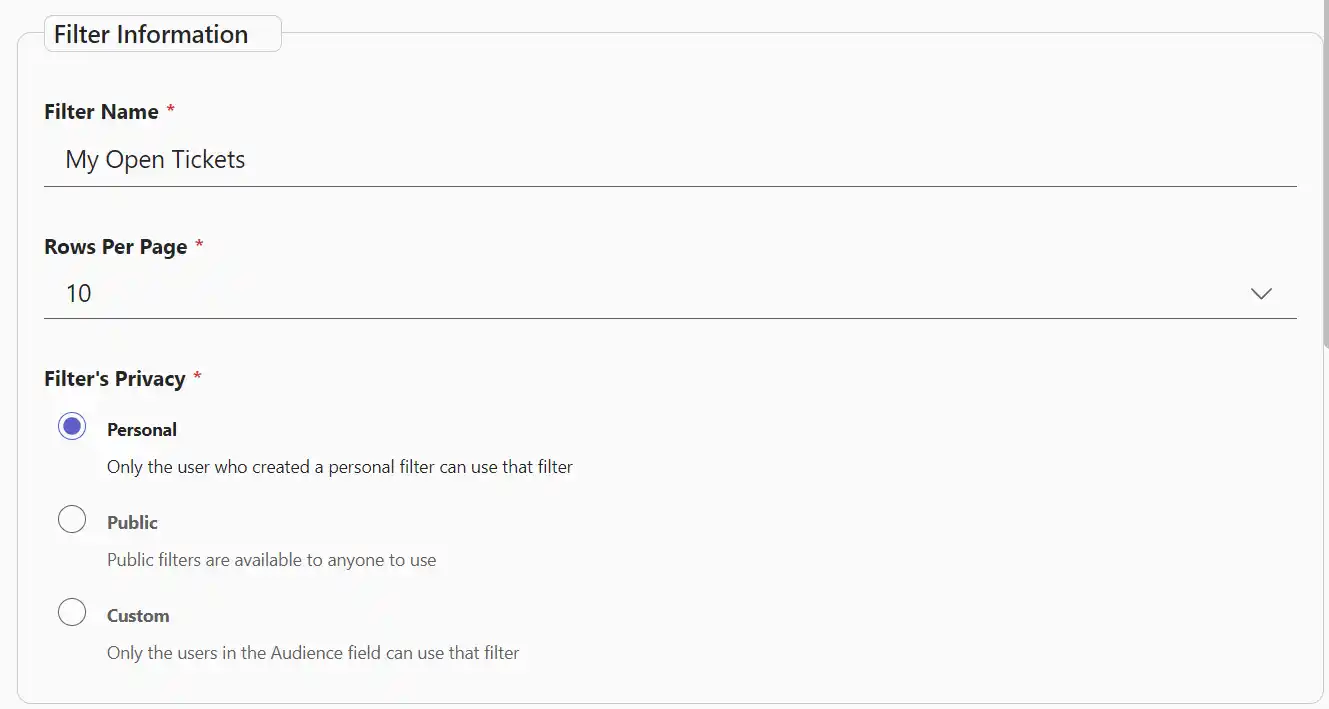
- Filter Name: Name your new filter.
- Rows Per Page: Set how many tickets are shown per page.
- Filter Privacy: Choose Public, Personal, or Custom visibility.
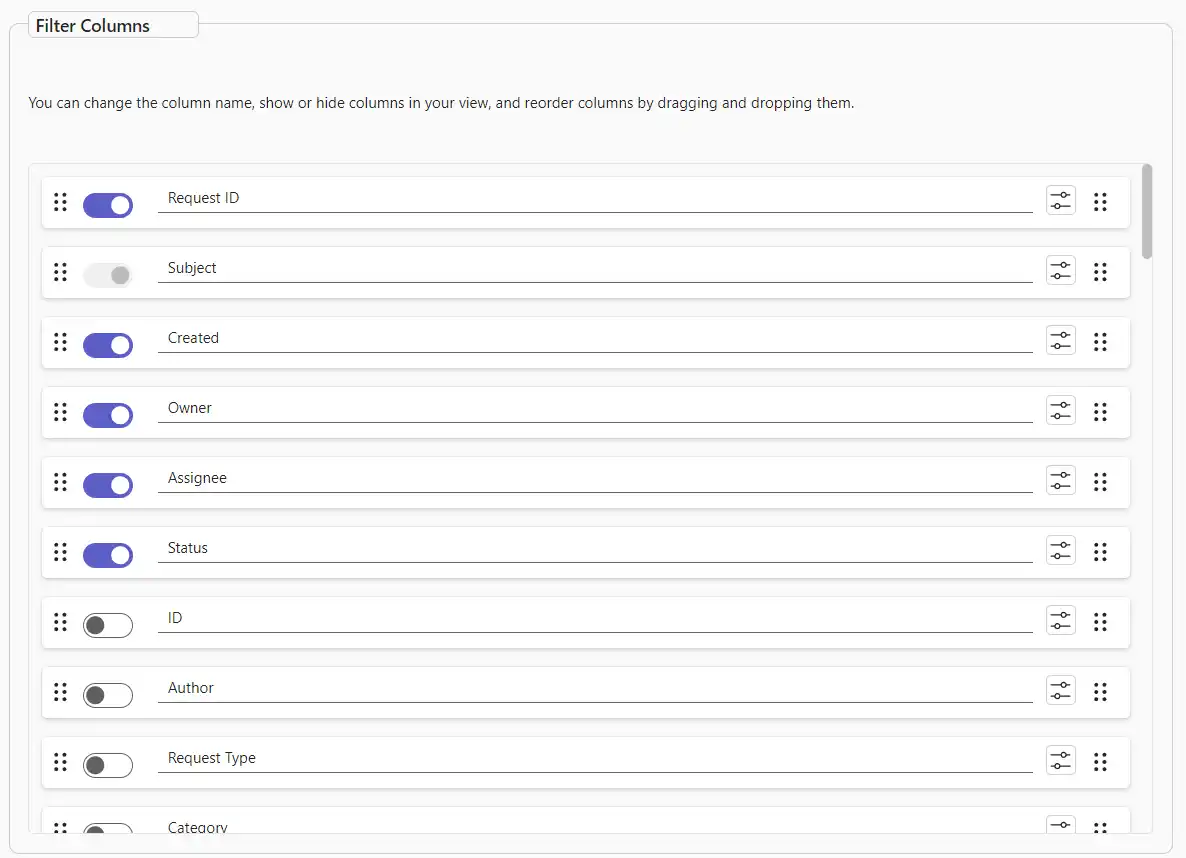
Step 3: Select displayed columns
Choose the system and custom columns you want to display in this filter.
Step 4: Define filtering criteria
Choose ticket attributes to filter by.

- Department, request type, category, and subcategory.
- Status, priority, and ticket source.
- Owner site, assignee, owner, author, and handled by.
- Date filters: created after, created before, and last X days.
Step 5: Apply and use your filter
You are ready. Click the created filter to display tickets based on your configured criteria.