If you're new to SteadyPoint SharePoint Helpdesk App, the first thing you need to learn is how to create a support ticket. This quick guide walks you through the steps.
How to create a ticket in SteadyPoint SharePoint Helpdesk
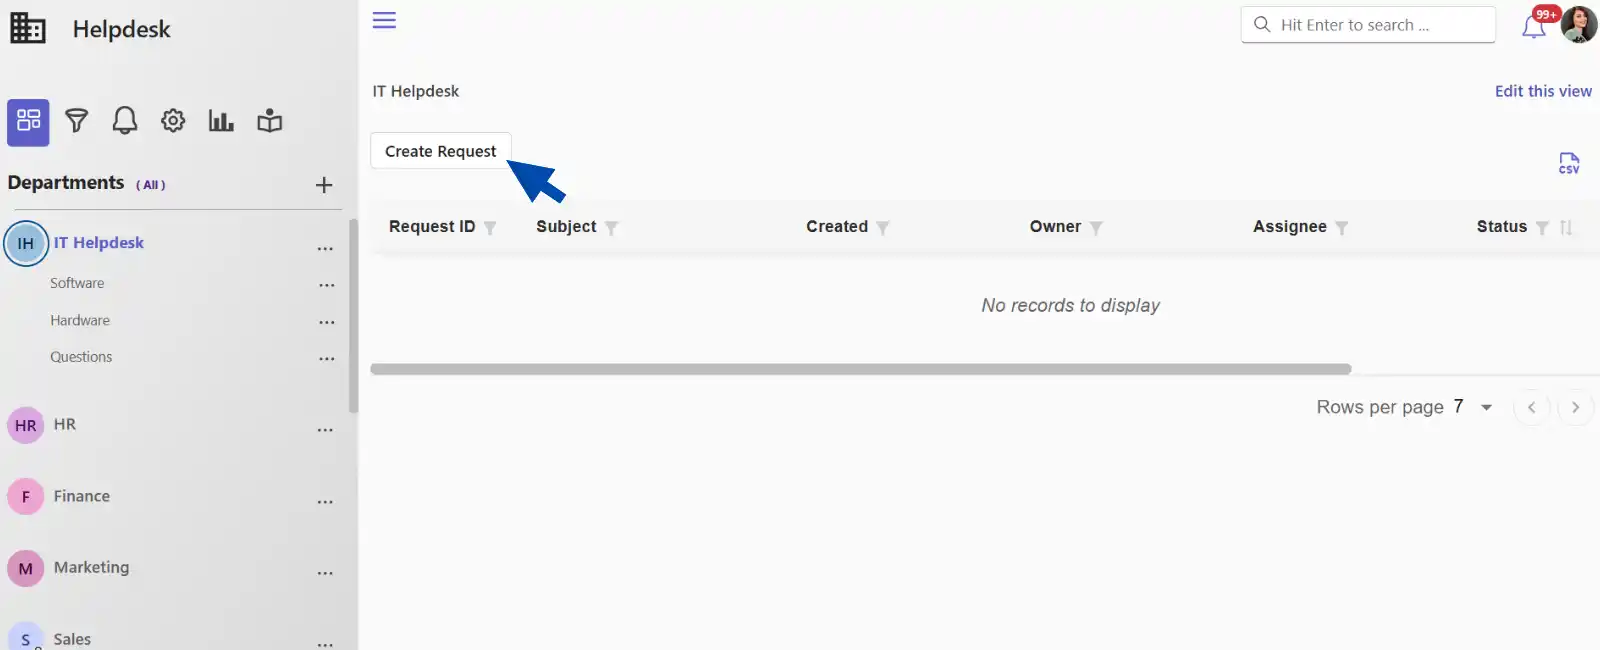
Step 1: Open Helpdesk from your SharePoint site
Step 2: Click "Create Request"
Step 3: Choose Department and Request Type
Choose the relevant Department and Request Type. If available, select the Category and Subcategory to load the correct form.
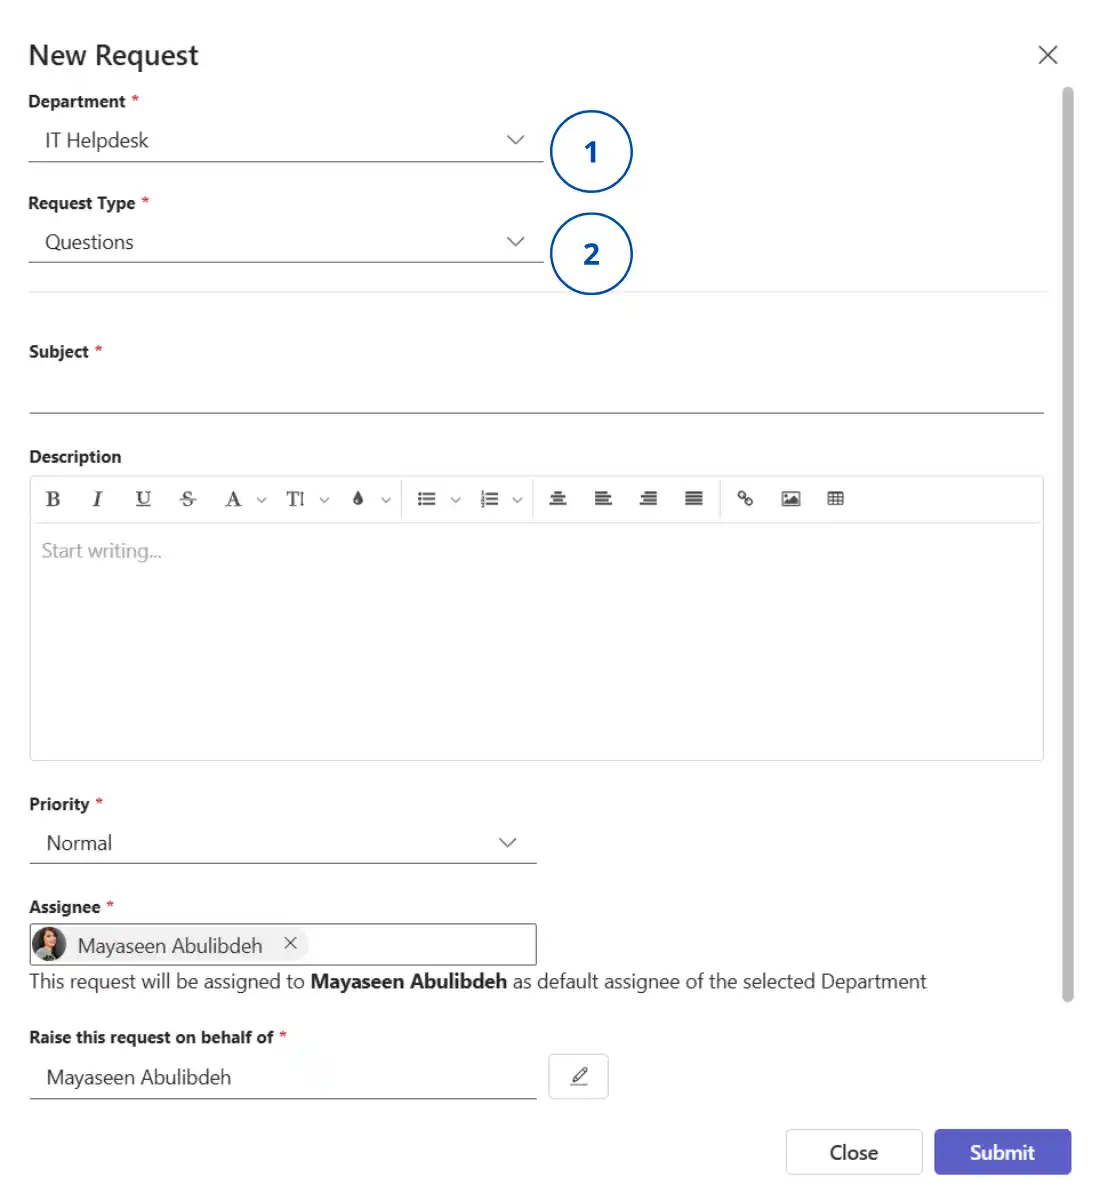
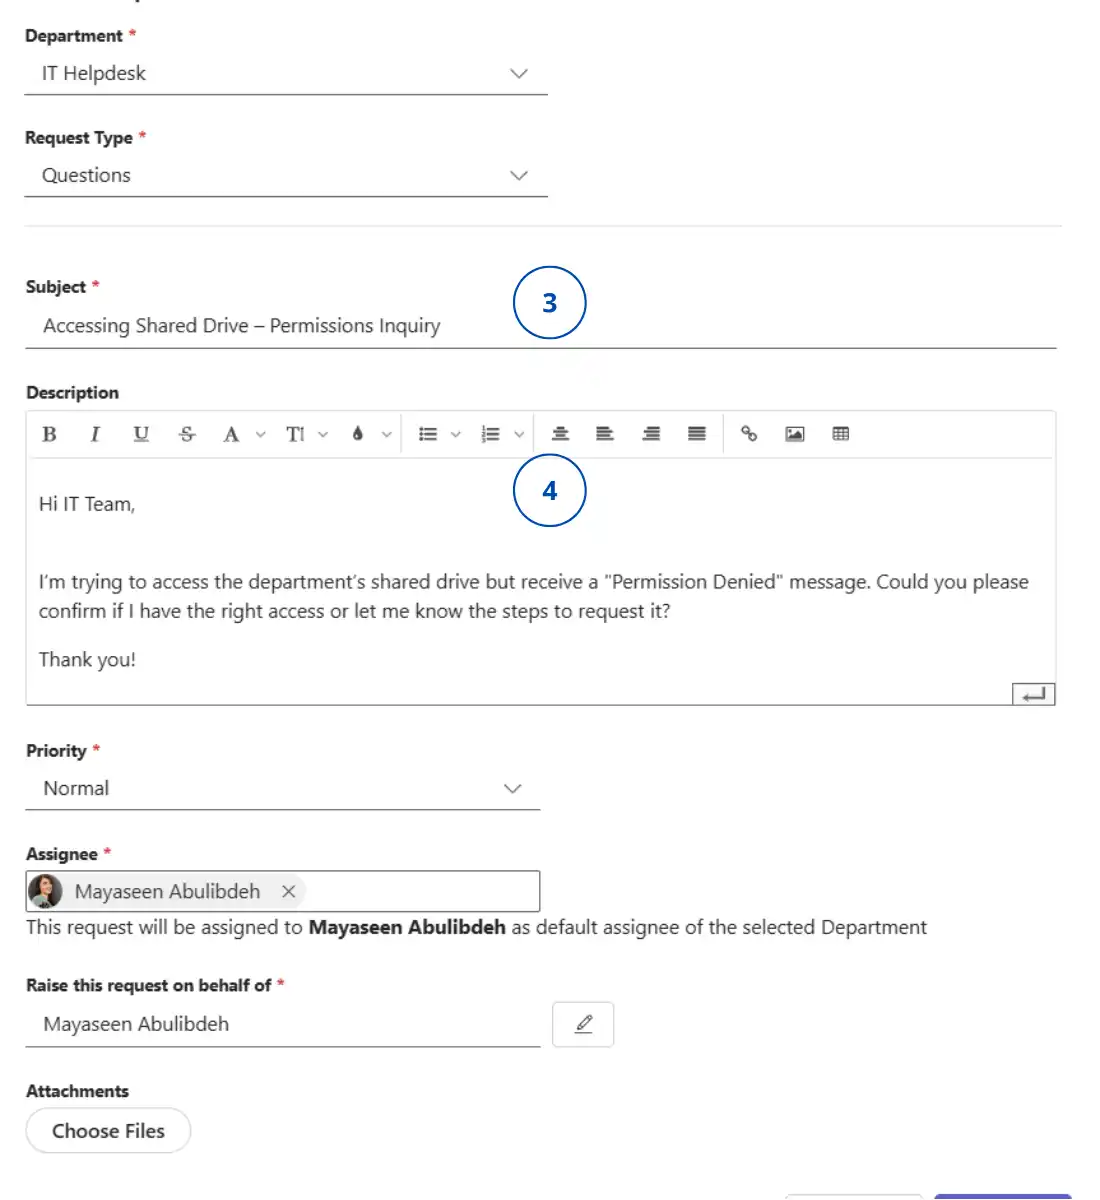
Step 4: Fill in ticket details
Fill in the Subject, Description, and any required fields (marked with a red star).
Step 5: Review assignee behavior
- In a private department, if a dropdown appears, you can manually assign the ticket to an agent.
- If no dropdown appears, automatic routing is enabled and assignment is based on request type.
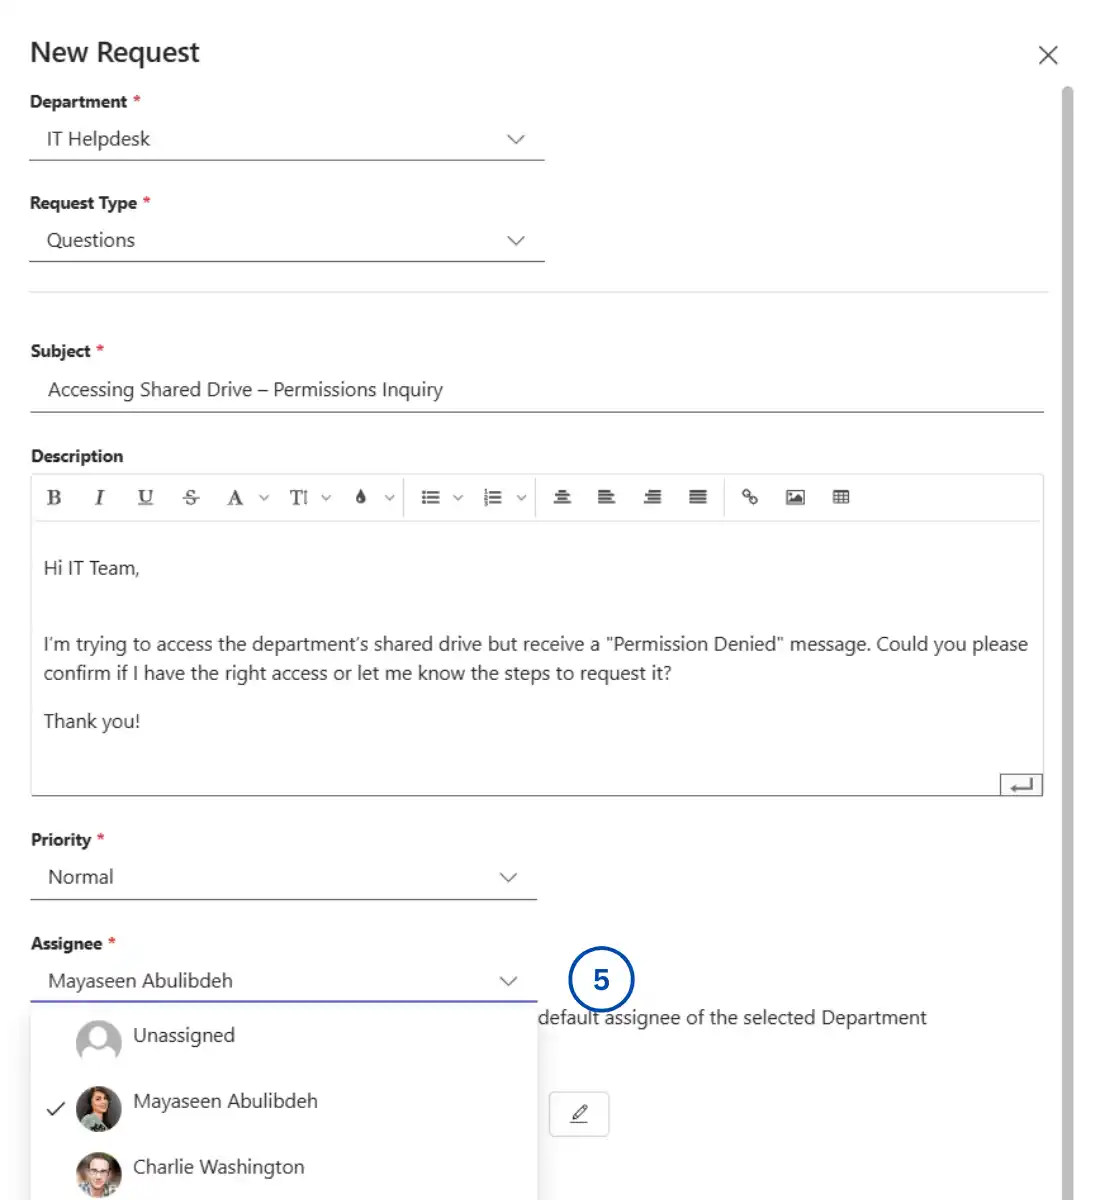

Sometimes, the system selects an assignee by default while still showing a dropdown. In this case, both automatic and manual assignment are enabled, so you can keep the suggested assignee or choose another one.
In a public department with manual assignment enabled, you need to type the agent's name manually because a selection list is not available.
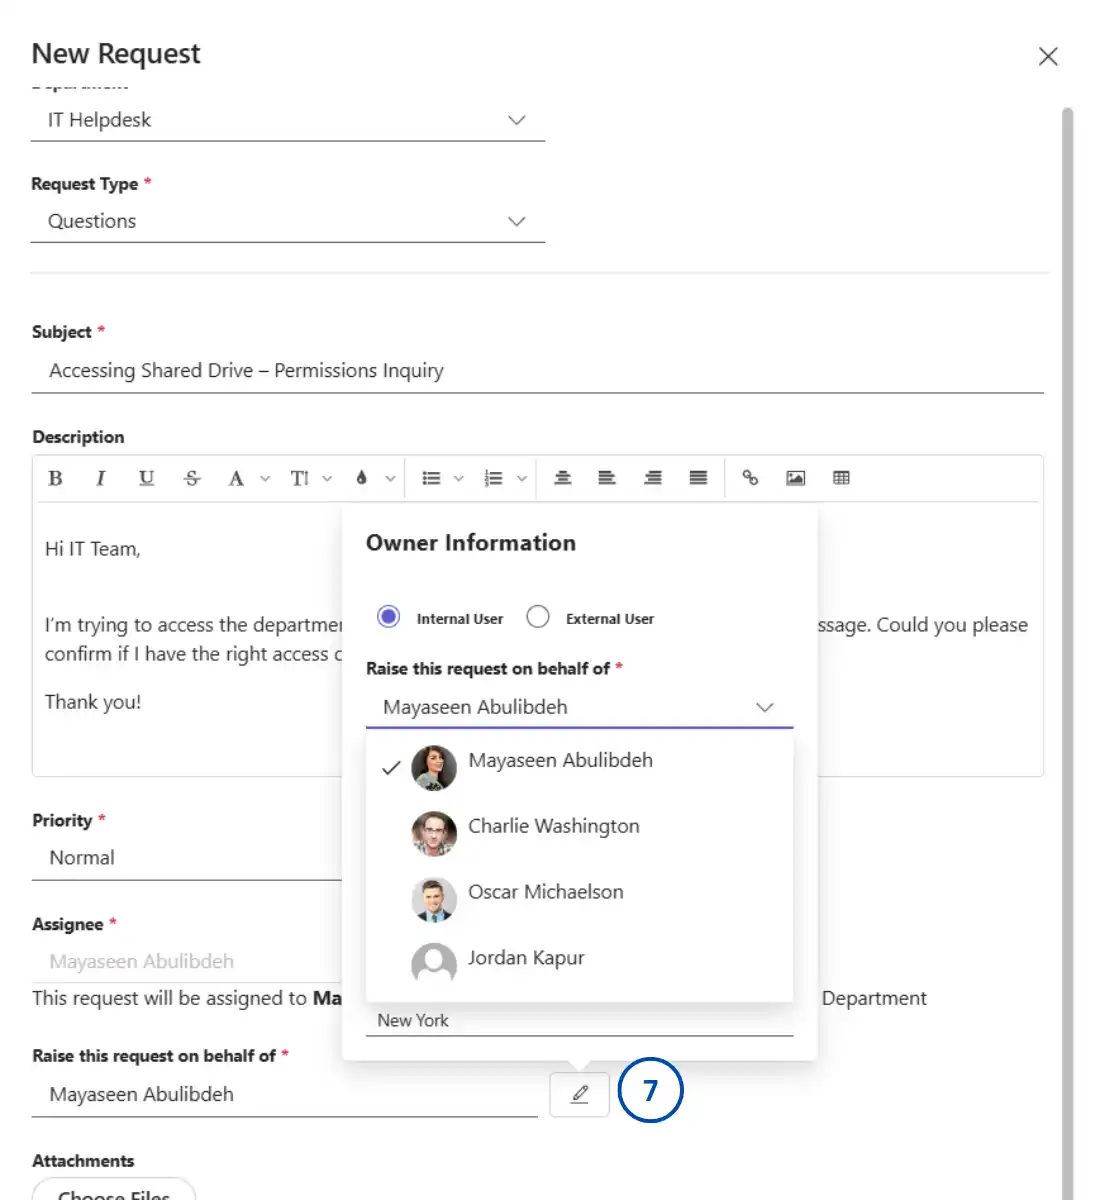
Step 6: Raise request on behalf of another user (optional)
To create a ticket on behalf of someone else, update the "Raise this request on behalf of" field. This changes the ticket owner, while you remain the author.
That’s it. You’ve submitted your first ticket and are now on your way to resolving issues efficiently.