To activate SLA and triggers modules, you need to set up the automation solution in Power Automate.
A Power Automate Per-user-plan license is required for one user (the user running the workflow). If you have an MS365 E3 or E5 license, check whether Power Automate is already included.
SteadyPoint's Power Automate Solution
Checking available solution files...
Prerequisite Permissions
- You must be a Global Admin.
- Or be granted the Power Automate Admin role by a Global Admin.
Set Up the Solution for SteadyPoint SharePoint Helpdesk
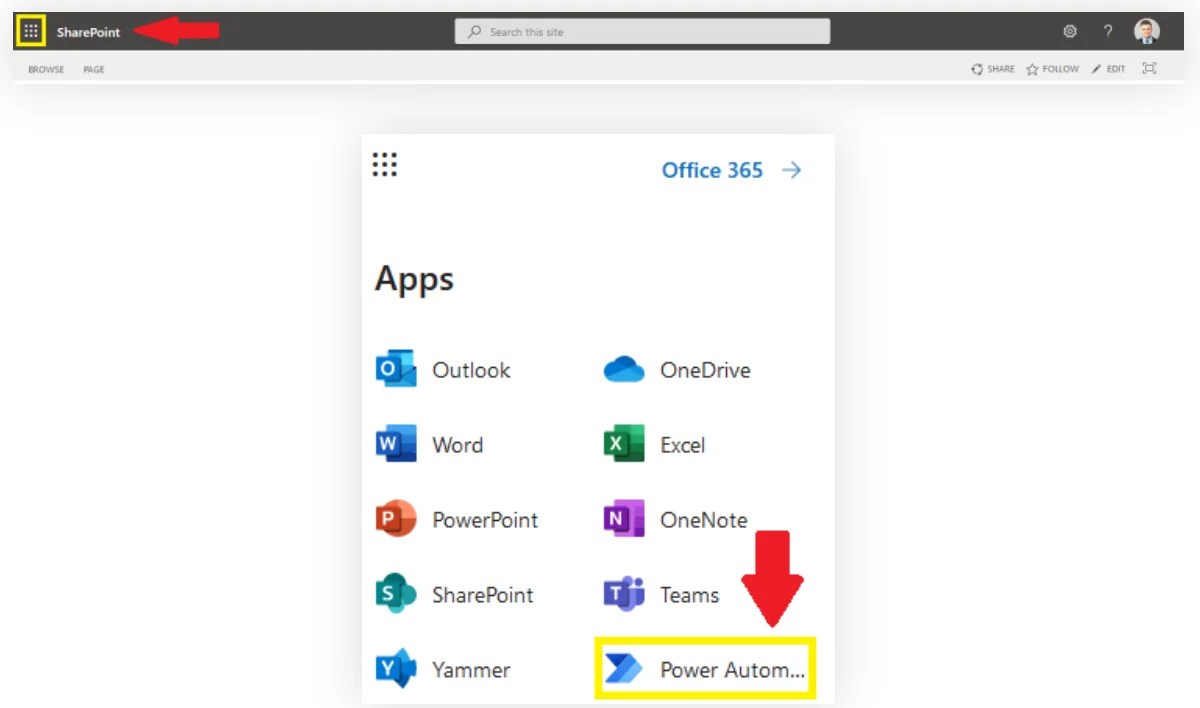
1Select Power Automate from the top left corner.
2Go to Solutions.

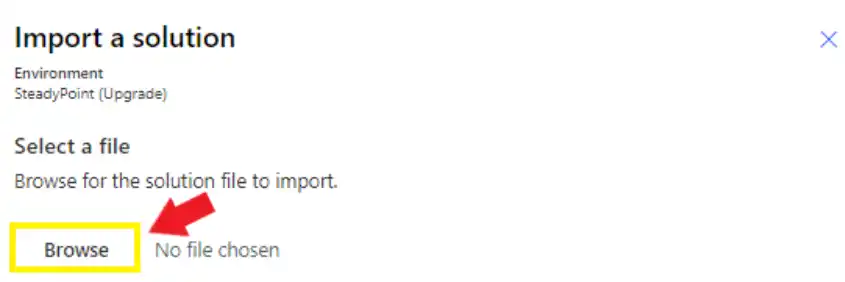
3Click on Import.

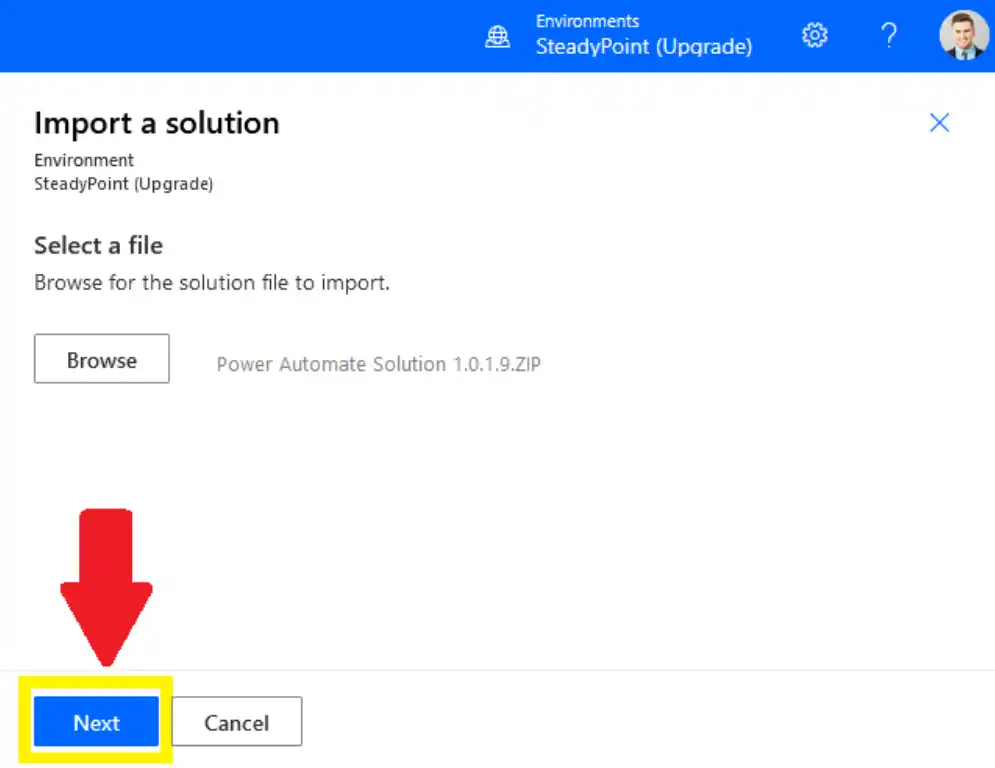
4Click on Browse to select the file.
5Click on Next.
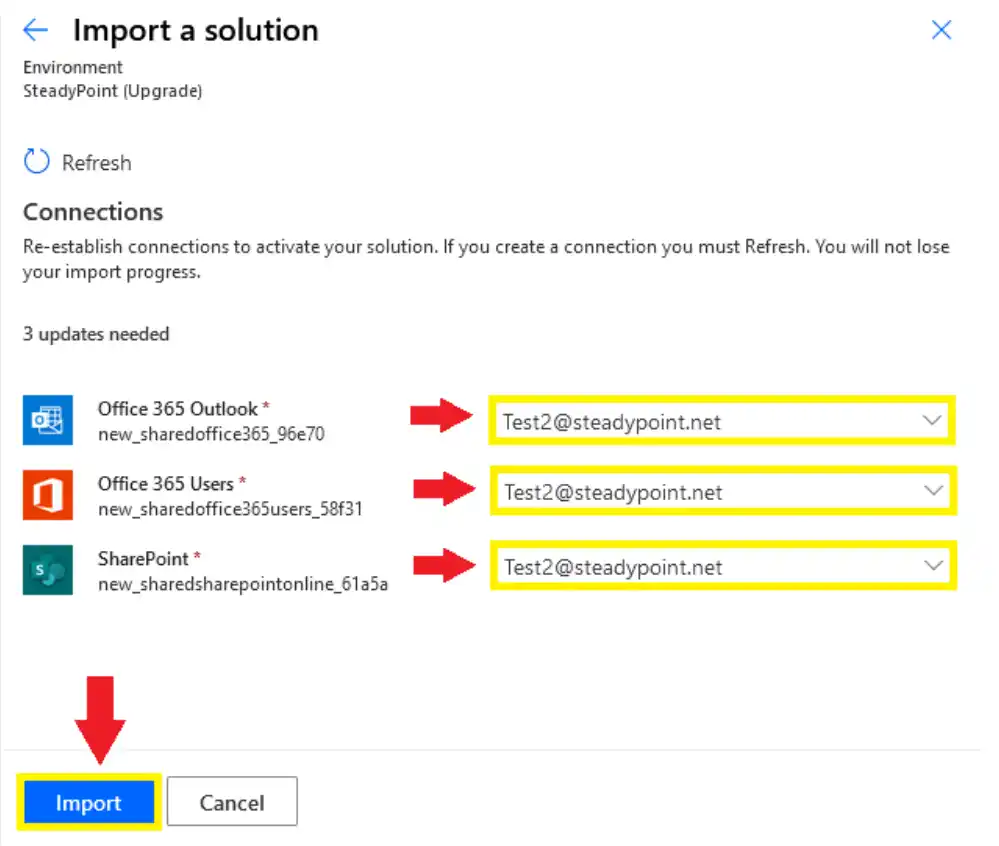
6Fill in the address fields, then Import.
7Click on the new Solution.

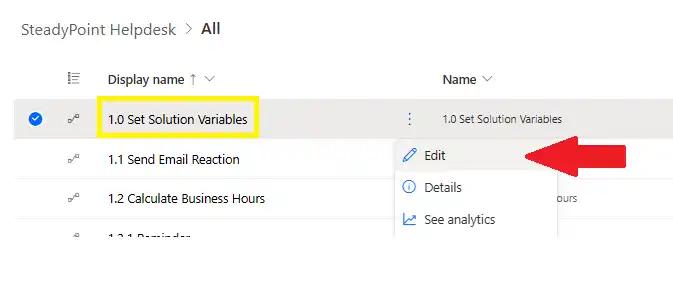
8Click the three ellipses next to Set Solution Variables, then select Edit from the menu.
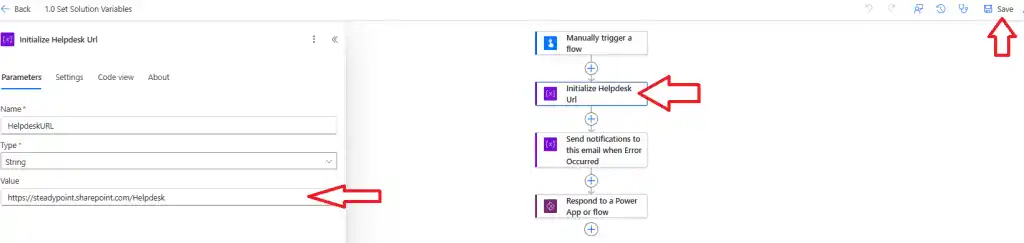
9Add the site link where the helpdesk is installed.
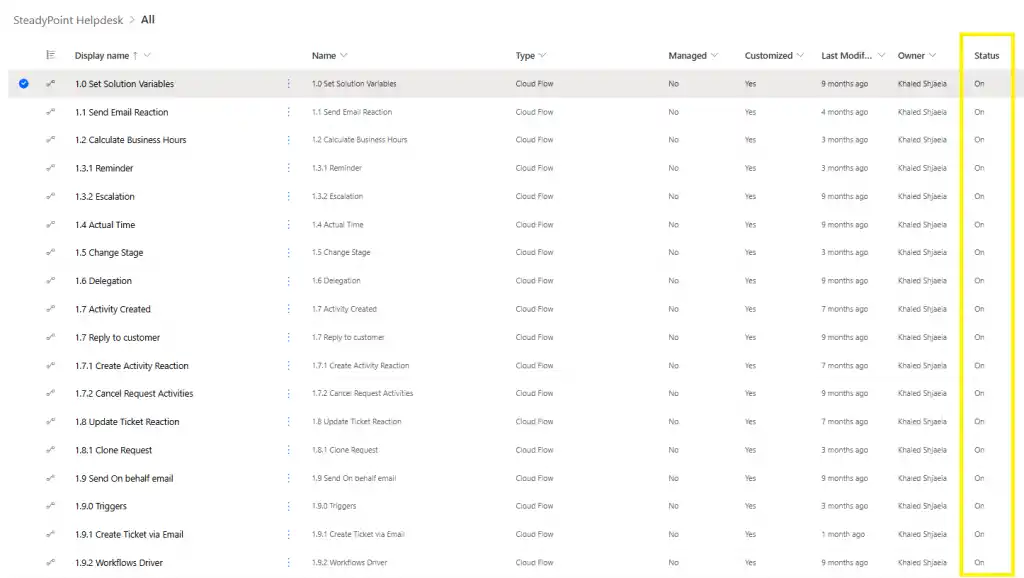
10All flows that come before Workflow Driver should be set to On.
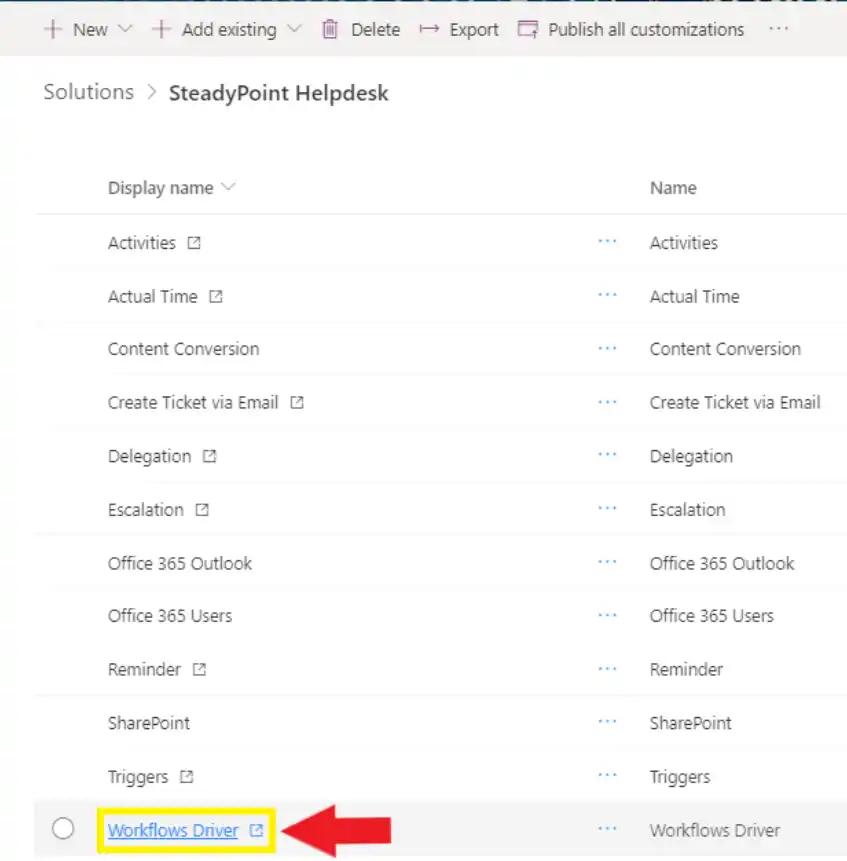
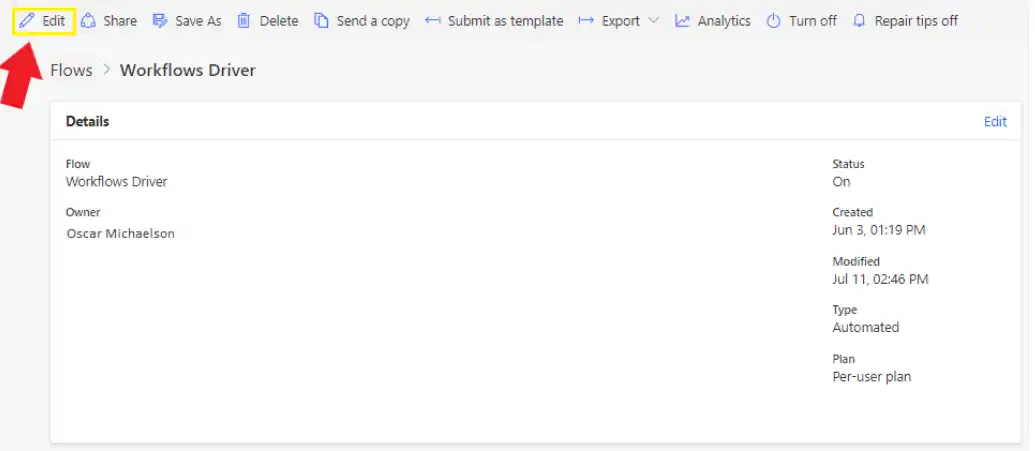
11Click on the Workflow Driver.
12A new window will open. Click on Edit on the top left corner.
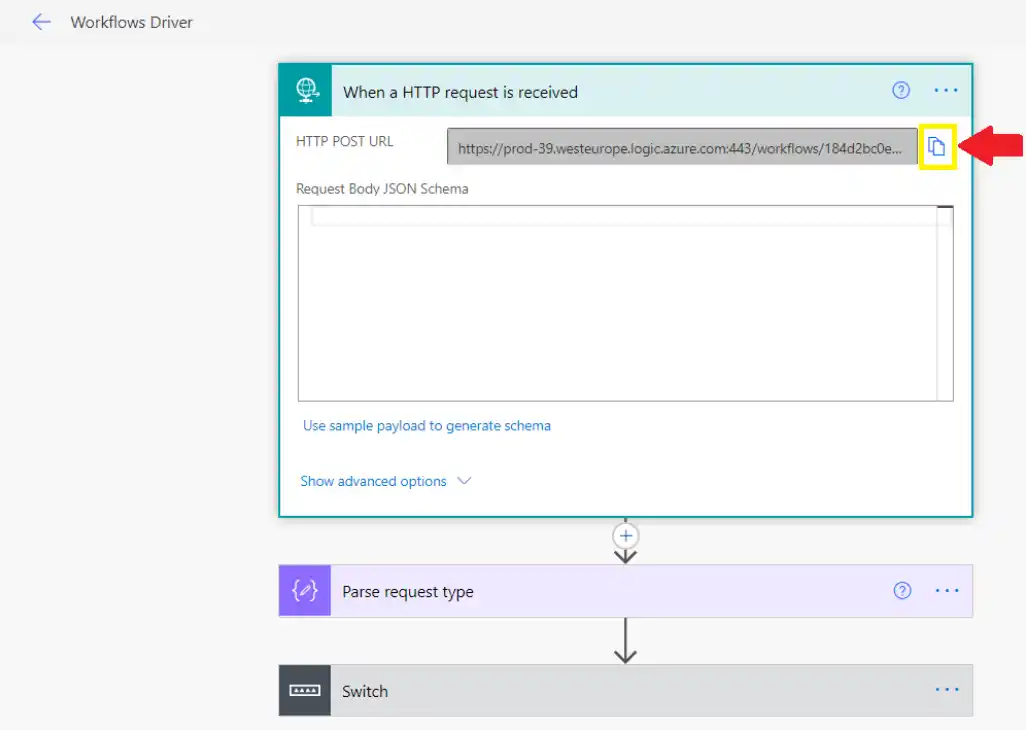
13Copy the HTTP POST URL.
14Go back to Helpdesk > Settings > Automation > Triggers.
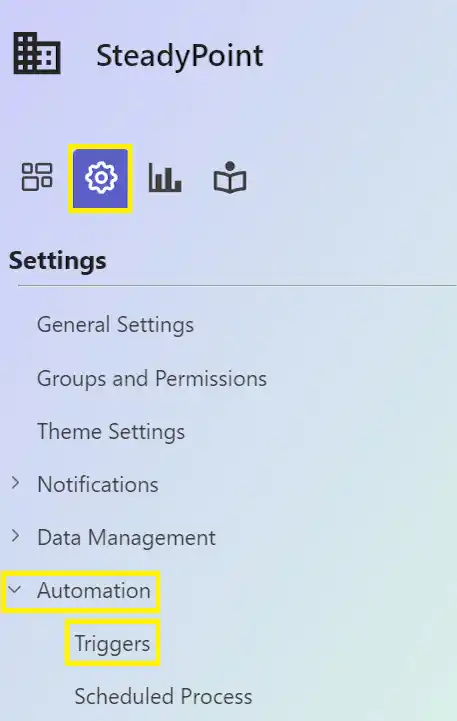
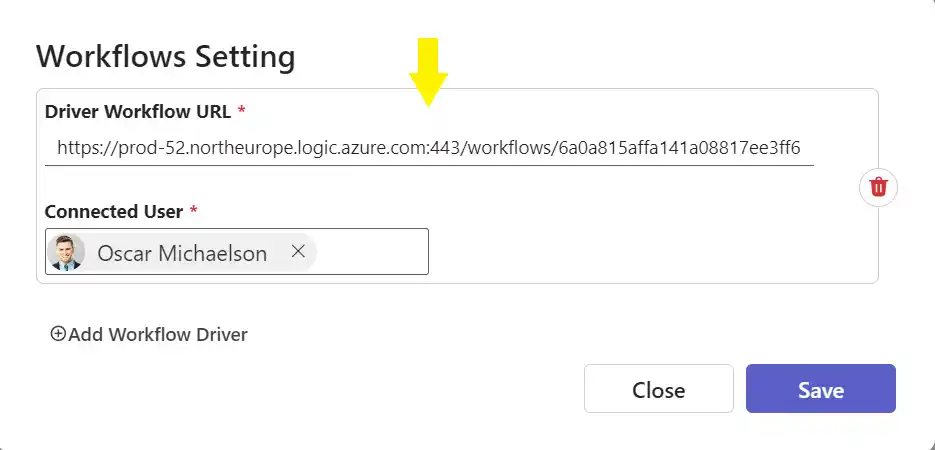
15Click Configure Triggers Workflow URL, paste the copied URL, and save.
It is suggested to create a new email account to receive incoming emails (e.g. helpdesk@yourcompany.com).
If your solution supports more than one email, repeat the same setup steps for each email and make sure you use the right address in step 6.
Need help? Book a time slot and we will set it up with you.
If you have a solution that supports more than 1 email, then repeat the same steps for each email, and make sure to type the right email address in step 6.