To ensure that only authorized personnel can access the list views in our SharePoint-based helpdesk system, you can restrict regular users by creating a custom SharePoint helpdesk permissions level. Here’s a step-by-step guide to setting up these permissions.
Ready to take control of your support system? 👉 Install SteadyPoint Helpdesk and secure it with powerful permission settings.
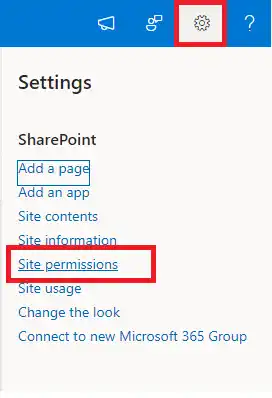
- Open the site hosting the Office 365 ticketing system, click on the settings gear, and then select Site Permissions.
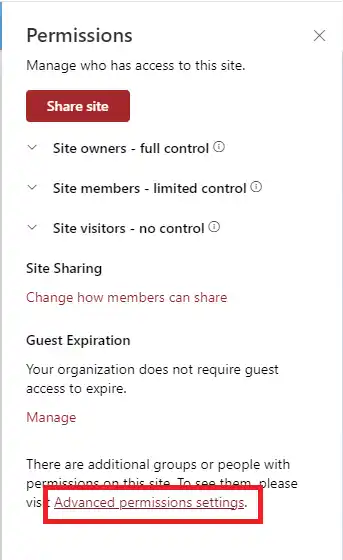
- Click on Advanced Permissions Settings.
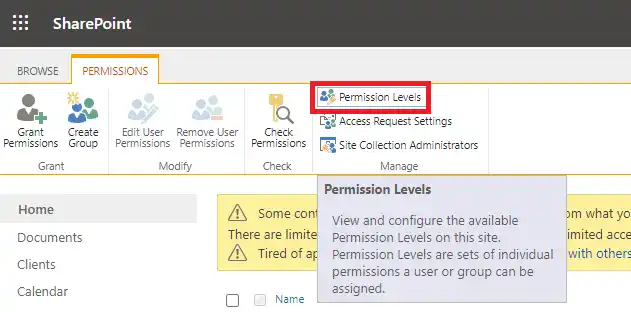
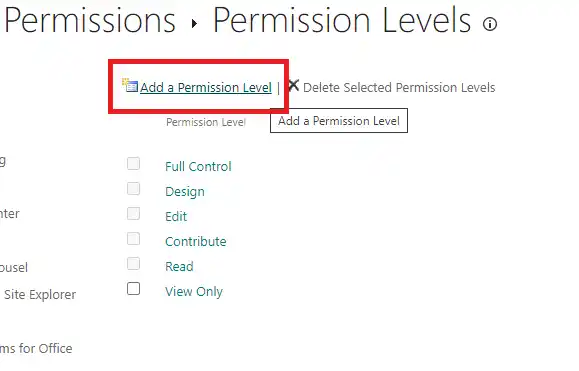
- Click on Permission Levels.
- Click on Add a Permission Level.
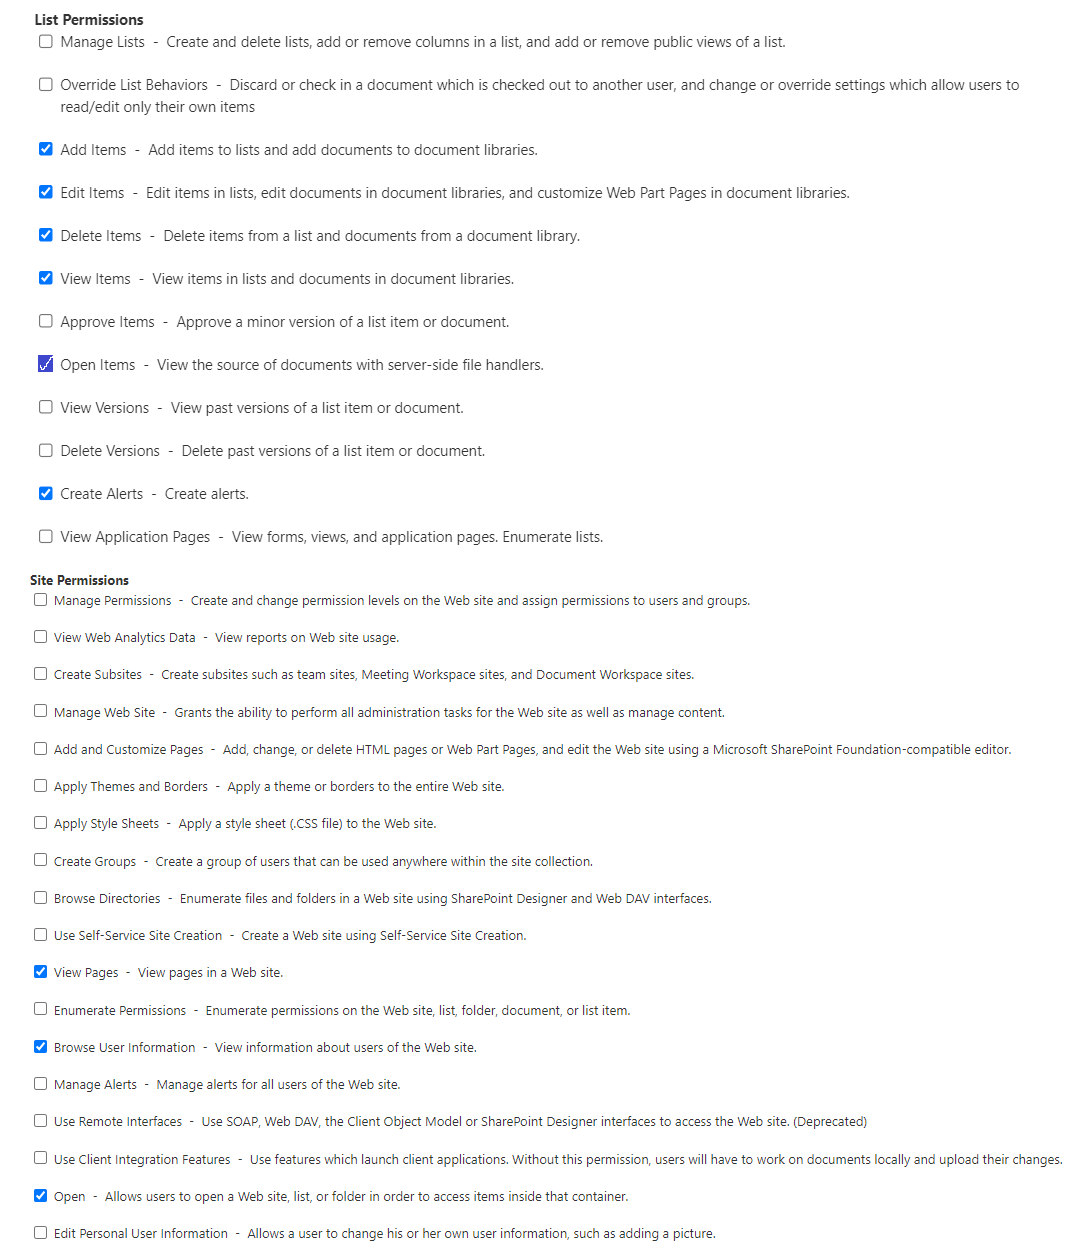
- Enter a name and description, and select the permissions shown in the image below.
- Click on Create.
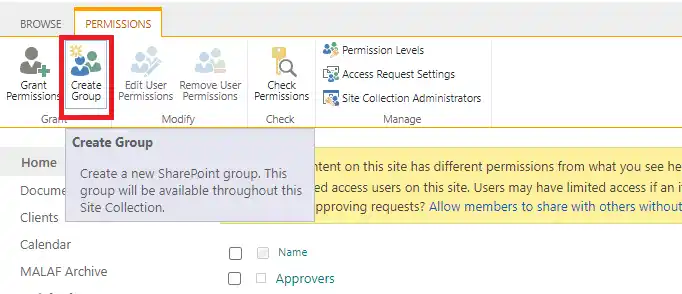
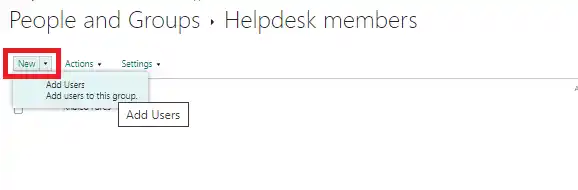
- You can create a new SharePoint group and assign the newly created permission level to it.
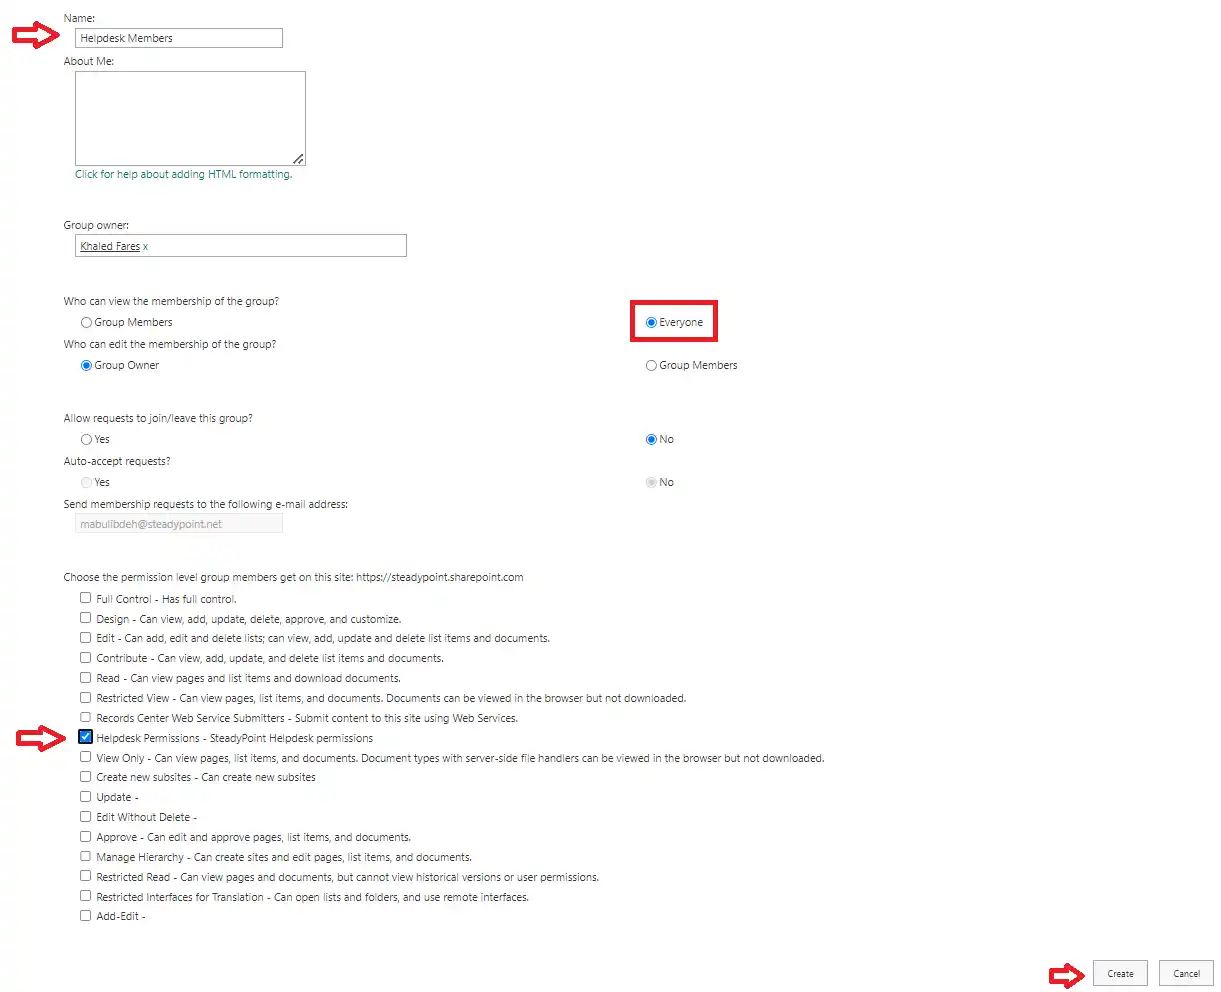
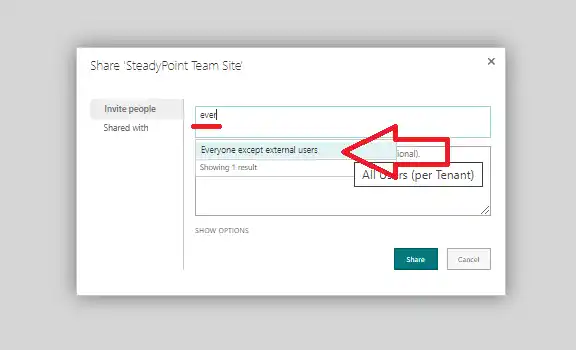
- Add everyone to that group, which means all users.
This will prevent anyone from viewing any list views.
For this to work, please keep the following in mind:
- Remove everyone or all regular users from any other groups.
- Ensure that admins remain in the Owners or Members group.